Vernal (Spring) Equinox 2025

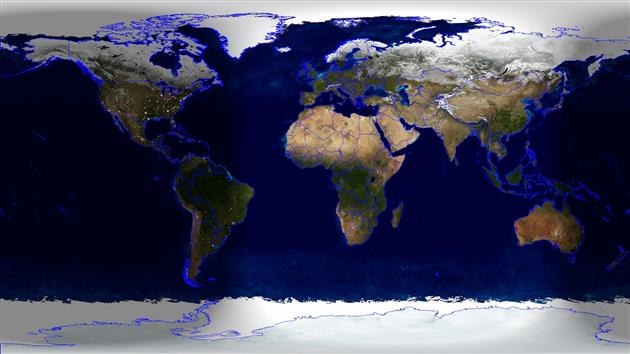
Spring Equinox 2025 in Catfood Earth

Spring has sprung (09:02 UTC, March 20, 2025) for the Northern Hemisphere and Autumn is here if you are south of the Equator. Rendered in Catfood Earth.

Add your comment...

Related Posts

(All Code Posts)

(Published to the Fediverse as: Vernal (Spring) Equinox 2025 #code #earth #catfood #equinox #spring #vernal #autumn The exact moment (09:02 UTC, March 20, 2025) of the Spring Equinox in Catfood Earth. )

Building a Digital Photo Frame

Building a Digital Photo Frame

Google recently bricked my digital photo frame, so I set out to build a new one. I did this in two parts - a Raspberry Pi to display the photos, and a C# script to preprocess them. The second part is optional but worth it.

The display side of the project turned out to be way easier than I thought. There is a utility called fbi that will run a slideshow to a HDMI monitor. Create a boot SD card from the lite version of Raspberry PI OS, copy over your photos and then run:

sudo apt-get update
sudo apt-get -y install fbi

You can then connect a monitor and test that images are displaying as expected.

Create a file called launch.sh with the following:

#!/bin/sh
# launch.sh
# run photos
sleep 2m
fbi -T 1 -noverbose -mode 1366x768-30 -t 60 -u -blend 1500 -a /home/rob/photos/*.jpg

-T 1 uses the first display, -noverbose just shows the photos, -mode depends on your monitor and is likely safe to omit, -t 60 changes the image ever sixty seconds, -u displays in a random order, -blend 1500 cross fades for 1.5 seconds between images, -a is auto zoom and the path at the end is where ever you copied your photos to.

The sleep 2m command allows the system to complete booting and bring up the login prompt. Without this the photos might start first and then the login shell ends up on top, which is pretty boring.

Make the script executable (chmod 755 launch.sh) and then edit your crontab:

sudo crontab -e

Add the following:

@reboot sh /home/rob/launch.sh >/home/rob/logs/cronlog 2>&1
30 22 * * * /sbin/shutdown -h now

The first line runs the launch.sh script at startup and sends any output to a log file (adjust paths to your system). The second line will shut down the Pi at 10:30pm every day. I use this so I can control when it's running with a smart plug - the plug turns everything on at 7am and off at 10:45pm, and the shutdown prevents the Pi from getting in a bad state from having power removed unceremoniously. If you want it running all the time just omit this line.

Reboot and you should have a working digital photo frame. Fbi will do a reasonable job with your photos, but I wanted something better.

The C# script below preprocesses all my photos to make the best use of the frame. I'm using an old 1366x768 TV so I want all the photos at that resolution and 16x9 aspect ratio. Many of my photos are 4x3, or 3x4, or 9x16, or something else entirely. I don't want any black borders so cropping will be involved.

Cropping is handled by detecting faces and then trying to keep as many in frame as possible. This uses FaceAiSharp.

Photos are processed in two stages. The first stage just crops horizontal photos to fit the screen. Any vertical photos are saved in a list, and then paired using image embeddings (CLIP using this code). My implementation pairs the most similar photos - it would be easy to do the most different as well.

Here's the code. I run this with C# 9 in VSCode on Windows. You'll probably want to change the input and output folders, and possibly the output resolution as well:

Add your comment...

Related Posts

(All Code Posts)

(Published to the Fediverse as: Building a Digital Photo Frame #code #c# #raspberrypi #ai #ml How to create a Raspberry Pi based digital photo frame with face aware cropping and AI image pairing. )

Simple Perceptron

By Robert Ellison. Updated on Monday, February 24, 2025.

Simple Perceptron

Add your comment...

Related Posts

(All Code Posts)

(Published to the Fediverse as: Simple Perceptron #code #ml #perceptron #wml Python notebook illustrating a scratch perceptron implementation as well as an sklearn example. )

Adding AI to Todoist with Google Apps Script and OpenAI

By Robert Ellison. Updated on Monday, February 17, 2025.

An AI completes a task on a To Do List

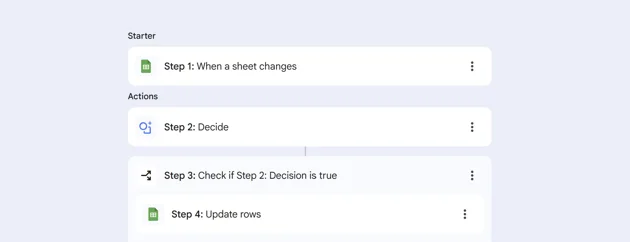
This simple script adds useful AI to Todoist and runs in the cloud on Google Apps Script.

I use Todoist to run my life, and my dream is for it to be able to complete certain types of tasks for me. With OpenAI Operator and Anthropic Computer Use this is getting closer and closer to reality. Yes, there is a risk that Todoist spends all of my money on paper clips. But there is also the upside that it will eventually do my weekly shopping, pay my bills and call back the dentist's office. Google's new Ask for Me is promising too, even if right now it's just going to bother nail salons out of existence.

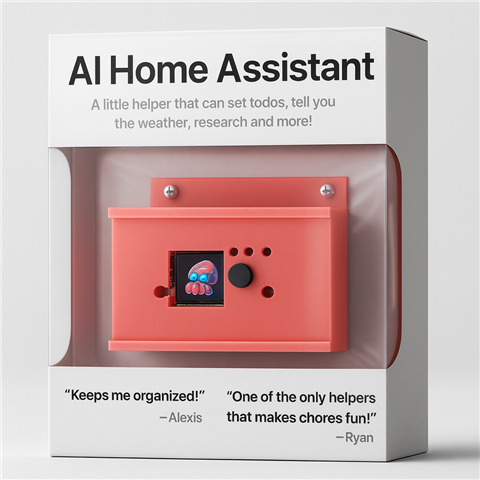
I already put together an Alexa replacement using a Raspberry Pi and the OpenAI realtime API. It switches lights on and off, adds things to my to do list, figures out when the next L is coming and more (I'll blog more about this soon).  One thing I learned is that this kind of thing can get pretty expensive. I can see why Amazon is procrastinating on an LLM Alexa. But costs keep going down, and the future will get more evenly distributed over time.

The first version of this script has two objectives. Respond to tasks, and create calendar events. Here's the script:

To get this working you need API keys from OpenAi and Todoist. Perplexity is optional, if you have a key add it at the top. It only works with tasks that have the right label, ai is the default - you can change this with AI_TASK_LABEL. I initially developed this with o1, but it looks like the tool use was rushed out too quickly and it calls the same tool repeatedly. GPT-4o works well enough and you can test switching out the model by changing OPENAI_MODEL.

Quick configuration guide - create a Google Apps Script project in Google Drive. Paste in the code above and add your API keys and any other desired configuration changes. Go to Project Settings in the right hand navigation and make sure your time zone is correct. Then go to Triggers and schedule the function trigger to run periodically (I use every 5 minutes). You should be done.

Back in Todoist add the ai label to a task (or whatever label you set in the script) and the AI will respond. With the current script there are two use cases - ask it to create an event (it can invite people, add details to the description, etc.), or ask it to research some aspect of the task you're working on. I think this is helpful because it has the full context of the task, and while you're working in Todoist it's useful to store the history there as well.

The point here is to extend the number of tasks that the script can take on. Add new tools for the AI to consider in the getTools() function, and then wire that tool into an implementation in generateAIResponse(). createCalendarAppointment() is a good example of using built in Google services - as well as the calendar it's pretty easy to interact with email, Google docs and many more. I'm planning to add file uploads as well, and will update this post with iterations of the script that add helpful functionality.

OpenAI recommends around 20 tools as the maximum. At that point it might be necessary to break this up into multiple assistants with different tool collections.

Let me know in the comments if you manage to use this to start crossing anything off your list.

Updated 2025-02-17 01:18:

Updated the script to support images and Perplexity. 

Image support takes advantage of multimodal input. Any image attachments will be sent as part of the conversation. This uses the large thumbnail in Todoist by default. It supports JPEG, GIF, PNG and WEBP. If a thumbnail is not available it will send the full size image without resizing, depending on how large this might not be accepted by OpenAI. 

Perplexity is implemented as a tool (so OpenAI is always called, and it may optionally call out to Perplexity to get more information). This is useful for web search, local search and knowledge past the training cutoff for the OpenAI model. It's optional, if you don't include a Perplexity API key then it just won't be used. 

Here's a simple use case - add a photo of a book and ask Todoist to find the URL where you can order it on Kindle. 

Add your comment...

More Google Apps Script Projects

(All Code Posts)

(Published to the Fediverse as: Adding AI to Todoist with Google Apps Script and OpenAI #code #ai #openai #todoist #ml #appsscript #gas #google #perplexity How to add an AI assistant to Todoist, includes code to respond to tasks and create calendar appointments with gpt-4o. )

Winter Solstice 2024

By Robert Ellison. Updated on Sunday, January 5, 2025.

Winter Solstice 2024

Winter begins at 09:20 UTC on December 21, 2024, unless you're south of the Equator in which case happy summertime to you. Rendered in Catfood Earth.

Add your comment...

Related Posts

(All Code Posts)

(Published to the Fediverse as: Winter Solstice 2024 #code #catfood #earth #winter #solstice The exact moment (09:20 UTC, December 21, 2024) of Winter Solstice as rendered in Catfood Earth. )

Fix Rivian Drive Cam Distortion

Corrected Rivian Drive Cam Frame

Rivians have a drive cam feature that will continually record footage from four cameras (front, rear, left and right) while you're driving. It's a built in dash cam which immediately got me excited to make hyperlapse style movies of interesting drives.

My first attempt was very, very sad. Rivian dumps out the footage in some fisheye format that looks terrible. It also often skips frames, so when imported to DaVinci Resolve the dread Media Offline error pops up all the time during playback. Insta360 Studio handles the dropped frames and so I created the hyperlapse there and tried to zoom in enough to fix the fisheye but overall I was very disappointed. Hopefully Rivian fixes the footage or provides some sort of tool to make this feature usable at some point.

Today I wrestled with the problem a bit more deeply and got something working. The image at the top of this post is a drive cam frame that is dramatically improved. The trick is using the lenscorrection filter in ffmpeg. The filter requires k1 and k2 coefficients which I solved for by generating hundreds of videos and eyeballing them, like the horrifying experience of visiting an optician and suspecting that they're going to write your prescription based on your opinion of which letter looks better. After much juggling I settled on -0.45 and 0.11. In terms of command line this translates to:

This re-encoding also has the happy side effect of fixing the dropped frames.

I would love to have some official numbers to plug in (hint, hint Rivian). My Rivian is a 2025 Gen 2 R1S - I have no idea how much the camera module varies between different Rivian variants so this might work for you or might need more fine tuning. Having cracked this I'm currently processing some footage of a trip to Shasta Lake and will post that soon (update - it's here).

Add your comment...

Related Posts

(All Code Posts)

(Published to the Fediverse as: Fix Rivian Drive Cam Distortion #code #rivian #ffmpeg Using ffmpeg and the lenscorrection filter to fix the fisheye distortion on Rivian Drive Cam footage. )

Which PG&E rate plan works best for EV charging?

Simulated PG&E bills with and without EV charging

We recently got an electric vehicle and unsurprisingly our electricity usage has shot up - something like 125% so far. This is of course offset by not needing to buy gas, but the PG&E bill is starting to look eye watering.

PG&E offers an exciting and nearly impenetrable number of rate plans. Right now we're on E-TOU-C which PG&E says is the best choice for us. This is a time of use plan which makes a lot of sense - electricity is cheap off peak and expensive when it's in high demand. Running the dishwasher at the end of the day saves a few cents. Charging an EV at the right time is a big deal.

I decided to simulate our bill on each plan, with and without EV charging.

This turns out to be astonishingly complicated. There is probably a significant energy saving in having the billing systems sweat a bit less. It's not just peak vs. off peak, the rates are different for summer and winter. In some plans peak is a daily occurrence and in others it doesn't apply to weekends and holidays (raising the exciting sub investigation of what PG&E considers to be a holiday). Some plans have a daily use fee. Our plan has a discount for baseline usage, others do not.

That's all just for the conventional time of use plans. The EV plans introduce a 'part-peak' period so there are three different rates based on time of day. They also have different definitions of summer.

I had imagined a quick spreadsheet but this has turned into a python exercise. The notebook is included below. If you use this you'll need to estimate your average daily EV charging needs and also your baseline details. It uses a year of data downloaded from PG&E to run the simulation, so use the year before you started charging an EV. I think I've captured most of the details but I did take a shortcut with the baseline calculations - it uses calendar months instead of billing periods. PG&E billing periods range from 28-33 days, presumably because that will be cheaper in the long run.

It would be nice if PG&E had some kind of what-if modelling but I guess that's not in their best interests. Right now the web site says I should stick on E-TOU-C, which looks like a bad idea even based on the past year of usage. All of the plans are pretty close for me based on historical usage though. Adding an EV shows a huge difference. Off peak rates are a lot cheaper but in exchange the peak rates are much higher. I'll save a lot moving to the EV2 plan, which is what I've just done. It's not clear how you should choose between the different EV oriented plans without getting into this level of detail, but they are all better than the conventional time of use options if you have better things to do.

I evaluated the E-TOU-B, E-TOU-C and E-TOU-D time of use plans and the EV Rate A, EV Rate B, EV2 and E-ELEC plans for people with an EV or other qualifying electrical thing. The chart at the top of the post shows PG&E's estimates for the past year, my estimates and then my estimates with EV charging included.

Here's the code:

Add your comment...

Related Posts

(All Code Posts)

(Published to the Fediverse as: Which PG&E rate plan works best for EV charging? #code #pge #electricity #ev #python Simulating PG&E bills with and without EV charging across 7 rate plans to discover the cheapest option (Python). )

Autumnal Equinox 2024

Autumnal Equinox 2024 in Catfood Earth

The exact moment of Autumnal Equinox (12:44 UTC on September 22, 2024), rendered in Catfood Earth.

Add your comment...

Related Posts

(All Code Posts)

(Published to the Fediverse as: Autumnal Equinox 2024 #code #catfood #earth #equinox #autumnal Autumnal Equinox 2024 (12:44 UTC September 22, 2024) in Catfood Earth )

Catfood Earth for Android 4.40

By Robert Ellison. Updated on Sunday, September 29, 2024.

Catfood Earth for Android 4.40

Catfood Earth for Android 4.40 is now available on Google Play.

Earth has an updated look and feel and two new features.

The volcanoes layer has been ported over from the Windows version of Catfood Earth. When enabled this will show volcanoes that have recent activity (within the past week) using data from the Smithsonian Institution's Global Volcanism Program.

It's now possible to show your current location on the map. I'm not sure it's a replacement for Google Maps just yet but it does help you find where you are on the satellite image.

The release was prompted by Google requiring API level 34 support... completing this for Fortune Cookies was a nightmare but having learnt from that experience Earth made the jump to MAUI pretty smoothly.

If you already use Earth for Android you should get the new version shortly. If not, this is what Android live wallpaper was made for so give it a try!

Add your comment...

Related Posts

(All Code Posts)

Fortune Cookies for Android 1.50

Fortune Cookie Icon

Fortune Cookies for Android 1.50 is now available in the Google Play Store.

This update was driven by Google insisting that I target API level 34. Which is fair enough and I figured this would be a five minute task followed by a smooth release. I should have known better.

Of course the starting point is updating Visual Studio, updating the Android SDK, learning that my emulator won't launch any more and eventually coaxing it back to life. That's a couple of hours. Why this doesn't just happen when I'm doing other things I don't know, but for dev tools this has to be a ceremony.

Once all of that was done I learned that Xamarin was officially deprecated in May. I'm going to have to figure out MAUI.

There is a helpful migration page with this gob smacking advice:

"Once your dependencies are resolved and your code and resource files are added to your .NET native project, you should build your project. Any errors will guide you towards next steps."

I think they hired Yoda:

"Errors, they are. Guide you, they will, towards your next steps. Warnings, hmm, check them out you must... eventually. But information issues? Merely whispers they are, nudging you towards shiny new platform features, yes! Listen, you might, if time you have."

Anyway... the actual mechanics of getting this working in MAUI were not that bad. It could be that I need to reinstall my system with extreme prejudice but the platform itself seems to be very unstable. I constantly got Visual Studio and cryptic compile errors that went away on rebuild or a restart. Starting the android emulator has completely frozen my system several times requiring a hard reboot. I don't think I've had that experience since the Clinton administration.

Once it was finally working the Google Play Developer console wanted my "private" key, which I gave it; and to have a conversation about my tax situation in Cuba, which I'm ignoring for now.

As well as a brand new API target Fortune has a nifty new color scheme, a floating action button with a little fortune cookie on it, and will ask you nicely for permission to send notifications.

Add your comment...

Related Posts

(All Code Posts)

(Published to the Fediverse as: Fortune Cookies for Android 1.50 #code #fortune #software #cookie #catfood #xamarin #maui Catfood Fortune for Android is based on the UNIX command of the same name and will display a random and possibly no longer socially acceptable fortune from a less civilized era. )