Control LIFX WiFi light bulbs from Google Apps Script

Here is a simple apps script to control LIFX WiFi light bulbs. It turns on the bulbs in the morning until a little after sunrise and then again in the evening before sunset until a configurable time. As a bonus it will also rotate between some seasonal colors in the evening on several holidays.
To get this up and running you need a LIFX access token (from here) and a selector. If you have a group of lights called bob this would be group:bob. It could also be a single bulb ID like id:d3b2f2d97452 (more details here). There are some other settings you probably want to change: Latitude and Longitude (if you don't live in San Francisco for some reason), OnHour and OffHour for the time to switch on before sunrise and off after sunset, DaytimeOffsetMins is the minutes to wait after sunrise before switching off and before sunset for switching on, and then finally default color, brightness and fade time.
In Google Drive create a new apps script project and copy in the following code:
Configure the settings at the top in the code editor. Switch to settings (cog at the bottom of the right hand menu) and make sure the script time zone is correct for your location. Back in the code editor run the function nightSchedule() to check that everything is working as expected. This will print the calculated times and then switch the light on or off. Once you're happy with this, go to the Triggers page (clock icon) and set nightSchedule() to run as often as you like (I use every minute).
The current design of the script will update the bulb(s) every time you run it (so if you manually toggle on during the day the script will turn the light off the next time it runs). It would be possible to store the current state in script settings if you want it to behave differently. You could also add or remove holidays and colors to use to celebrate them. If you have other ideas or enhancements please leave a comment below.
Thanks to LIFX for a well documented and easy to use API. Also to sunrise-sunset.org for making a free API that provides sunrise and sunset times for any location.
For many years I had a similar setup using a Philips Hue and IFTTT. Philips pulled support for their proprietary hub and I wasn't about to buy a new one and the IFTTT triggers didn't provide a lot of control over the exact time to switch a bulb on or off. LIFX plus apps script is a much better solution. And it's at least half way towards the build-it-myself smart home philosophy I swore to a couple of years ago.
More Google Apps Script Projects
- Get an email when your security camera sees something new (Apps Script + Cloud Vision)
- Get an email if your site stops being mobile friendly (no longer available)
- Export Google Fit Daily Steps, Weight and Distance to a Google Sheet
- Email Alerts for new Referers in Google Analytics using Apps Script
- Animation of a year of Global Cloud Cover
- How to backup Google Photos to Google Drive automatically after July 2019 with Apps Script
- Using the Todoist API to set a due date on the Alexa integration to-do list (with Apps Script)
- Automate Google PageSpeed Insights and Core Web Vitals Logging with Apps Script
- Using the Azure Monitor REST API from Google Apps Script
- Monitor page index status with Google Sheets, Apps Script and the Google Search Console API
(Published to the Fediverse as: Control LIFX WiFi light bulbs from Google Apps Script #software #appsscript #drive #philips How to use Google Apps Script to control LIFX WiFi light bulbs and switch lighting on in the morning and evening around sunrise and sunset (plus special color programs for holidays). )
Using the Todoist API to set a due date on the Alexa integration to-do list (with Apps Script)
I love almost everything about Todoist. It's rich enough to scratch all my productivity itches while also being basic enough that I don't spend time gardening my tasks. Also, their Android app is just gorgeous, the exact opposite of Google's ascetic descent into identical lists of black in Material Design.
The one problem is the Alexa integration. You can add tasks to your shopping list or your to do list. The shopping list works great for me. I check it once a week when I do my grocery shopping and everyone knows to just tell Alexa when they need something. The to-do list is a disaster. These go to a separate to-do list project without a due date and I will never ever find them there. Anything else I add will end up in the Inbox with a due date of today so I'm forced to classify and if necessary reschedule it. Which is exactly what I want.
When I say 'Alexa, add x to my to-do list' I want that task to be visible. This integration design flaw could lead to at least one child growing up in an unfamiliar part of town without parents, or worse.
I emailed Todoist and they politely declined to change the way the integration works. After a brief period of steaming I've rolled up my sleeves and fixed it with their API. Which doesn't use OAuth so now I love them even more.
The script is below. Create a new Apps Script project in Google Drive (New and then choose More to find this) and copy in the code. You can get the API token from the bottom of the Integrations section in Todoist settings. Then just click the clock in the Apps Script project and schedule checkForAlexaTasksWithNoDate() to run as often as you need. The script will check the Alexa To-do List project and if anything is in there without a due date it will set it to today to force you to deal with it.
Updated 2022-12-06 21:27:
Todoist have updated their API to v2 (migration guide). There are no breaking changes for this code and so I got it working again by changing v1 to v2 in the API calls. The code above has also been changed to update dates in multiple projects, this is because I started checking for tasks with no due date in the Inbox project as well as Alexa tasks. You can delete the Inbox call if you don't want this behavior (and add additional projects if needed as well).
More Google Apps Script Projects
- Get an email when your security camera sees something new (Apps Script + Cloud Vision)
- Get an email if your site stops being mobile friendly (no longer available)
- Export Google Fit Daily Steps, Weight and Distance to a Google Sheet
- Email Alerts for new Referers in Google Analytics using Apps Script
- Animation of a year of Global Cloud Cover
- Control LIFX WiFi light bulbs from Google Apps Script
- How to backup Google Photos to Google Drive automatically after July 2019 with Apps Script
- Automate Google PageSpeed Insights and Core Web Vitals Logging with Apps Script
- Using the Azure Monitor REST API from Google Apps Script
- Monitor page index status with Google Sheets, Apps Script and the Google Search Console API
(Published to the Fediverse as: Using the Todoist API to set a due date on the Alexa integration to-do list (with Apps Script) #code #appsscript #google #drive #todoist #productivity Script to fix an annoyance with the Todoist Alexa integration where tasks are added without a due date leading them to be overlooked. Requires Google Drive and Todoist. )
Monitor page index status with Google Sheets, Apps Script and the Google Search Console API
Overview
Google just released URL inspection as part of the Search Console API. I check for issues periodically in Search Console but it would be great to just get an email when an issue crops up. The Apps Script project below does just that by monitoring URLs from your sitemap for changes and sending an email whenever anything is detected. The Search Console API has a limit of 2,000 calls per day and Apps Script also imposes a time limit on scripts. The approach I take below assigns a random day of the week to each URL to limit the number checked on each run. Depending on the size of your site you may want to remove this check (or go the other way if you have a large number of URLs to monitor). Follow the steps below to get your own monitoring spreadsheet up and running.
Google Sheet
Create a new spreadsheet in Google Drive and call it anything you want. Rename an empty sheet to 'gsc', this sheet will store the index data. You don't need to make any other changes to this sheet.
Choose Apps Script from the Extensions menu. This will open up the script editor for your spreadsheet. I find that sometimes the editor opens with the wrong account if you're signed into more than one. If that applies to you, check quickly to make sure the right account is selected. With Code.gs selected copy and paste the script below replacing the default function:
There are a few configuration variables to enter at the top. AlertEmail is the email address to notify when index status changes are detected. SitemapUrl is the full URL of your sitemap. The current implementation does not support sitemap index files, this needs to be a regular sitemap containing URLs. SearchConsoleProperty should be the URL of the site to monitor, or sc-domain: followed by the domain for domain properties (for this site sc-domain:ithoughthecamewithyou.com).
Click Project Settings (the cog in the left hand menu of the script editor) and copy the Script ID. Make a note of this for later.
API Console
Next we need to configure the Search Console API in the Google Cloud Platform Console.
- Create a new project (click the drop down to the right of 'Google Cloud Platform Console' and then New Project). Pick any name you like.
- Once the project is created, find APIs and Services in the left hand menu and choose Library.
- Search for Search Console, click on the Search Console API and then click Enable.
- A new screen will load, click Credentials in the left hand menu.
- Click Configure Consent Screen and choose the internal type.
- Fill in the required fields - application name and contact emails.
- Add the ./auth/webmasters.readonly scope for readonly access to Search Console data.
- Once the consent screen is complete click Credentials in the left hand menu again.
- Click Create Credentials at the top and choose OAuth Client ID.
- Choose Web Application.
- Add https://script.google.com/macros/d/{SCRIPTID}/usercallback to authorized redirect URLs, replacing {SCRIPTID} including the brackets with the Apps Script ID you noted above.
- Make a note of the Project ID.
Complete the Apps Script
Return to the Apps Script project and find the settings page. Set the GCP project to the project ID you noted above. Also on this page check the Show "appsscript.json" manifest file in editor option.
Go to the code editor and open appsscript.json. Add the following line:
"oauthScopes": ["https://www.googleapis.com/auth/script.external_request", "https://www.googleapis.com/auth/webmasters.readonly", "https://www.googleapis.com/auth/spreadsheets.currentonly", "https://www.googleapis.com/auth/script.send_mail"],
Make sure the script is saved and close the script editor window. Reload the spreadsheet. Once the reload completes you should have a Search Console menu at the top of the spreadsheet. Choose Update Data from the Search Console menu. This will run for a few minutes and then populate the 'gsc' sheet with your URL data. See UrlInspectionResult in the API documentation for more information about the meaning of each field. You should also get a lengthy email with a notification for each URL that was inspected. This will continue for the first week and then you'll only get updates for interesting status changes.
Scheduling
Now the project is working, open the script editor again (Apps Script from the Extensions menu) and open Triggers (the clock icon in the left hand menu). Click Add Trigger at the very bottom right of the window. Select runUpdate as the function to run. Change event source to time-driven, and then select day timer and an hour to run the script. Lastly click Save. Your Google Search Console monitor will now run every day, and if the index status of a page changes you'll get an email about it within a week. The spreadsheet will also come in handy for other analysis and reporting.
Troubleshooting
You might need to tweak the script if you start hitting limits. The URL inspection API currently has a 2,000 call / day quota. Apps Script will only run for around 7 mins on a free account and 20 mins if you have Google Workspace. If either of these limits apply you could modify the 'checkDay' logic to use day of the month (or year, or ...) to reduce the number of URLs inspected on each run. If you need to do this remember to update the Check Day column on the 'gsc' sheet as well.
The script assumes that the URLs you want to monitor are in your sitemap. If this is not the case you can add URLs to the sheet directly. As long as they are part of the configured property you will still get results. If you use this method you might want to comment out the updatePagesFromSitemap() call in runUpdate() to save time.
If anything else goes wrong please leave a comment below and I'll do my best to help you.
Updated 2022-02-08 17:40:
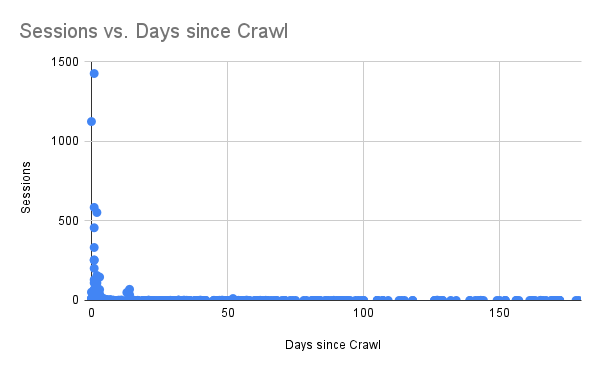
After a couple of days I have a full dump of my sitemap from the page index status API. I wrote this script for the alerting possibilities but couldn't resist some analytics once the dataset was complete.
The chart above shows sessions vs days since the last Google Crawl. Pretty stark - Google keeps a close eye on the pages it sends traffic to and not so much on the others.
I set lastmod honestly and there is good news here. I could only find two cases where Google had not crawled the page since the last modified date. So when the sitemap says a page has changed the odds are good that it will get another crack at the index. The two exceptions are unusual posts that are updated hourly and weekly respectively and both have been crawled recently.
The breakdown of index status matches Google Search Console pretty well but I have a handful of pages that are 'Indexed, not submitted in sitemap', even though they are in the sitemap and no such status is shown on Search Console. I don't know if this is a glitch in the index status API or something to do with how the pages were discovered. Some light searching suggests that this message is usually what you would expect it to be.
Lastly, updating the sheet for my site is more bound by script execution time than the API limits. I changed it to run every hour and instead of partitioning by day of week I used a random hour of the day which means I check every URL at least once every 24 hours.
Updated 2022-04-24 10:50:
I just updated the code and post above. I've had occasional issues where updating the sheet failed which caused the next run to go back to the beginning with no saved index status. To reduce the chance of this happening I've added some retry logic and also improved the speed of the sheet load and save functions. I also had a comment on the code that suggested an easier way to handle OAuth and have incorporated this in the new version.
More Google Apps Script Projects
- Get an email when your security camera sees something new (Apps Script + Cloud Vision)
- Get an email if your site stops being mobile friendly (no longer available)
- Export Google Fit Daily Steps, Weight and Distance to a Google Sheet
- Email Alerts for new Referers in Google Analytics using Apps Script
- Animation of a year of Global Cloud Cover
- Control LIFX WiFi light bulbs from Google Apps Script
- How to backup Google Photos to Google Drive automatically after July 2019 with Apps Script
- Using the Todoist API to set a due date on the Alexa integration to-do list (with Apps Script)
- Automate Google PageSpeed Insights and Core Web Vitals Logging with Apps Script
- Using the Azure Monitor REST API from Google Apps Script
(Published to the Fediverse as: Monitor page index status with Google Sheets, Apps Script and the Google Search Console API #code #searchconsole #appsscript #google #sheets #drive #seo How to use Apps Script in Google Sheets to automatically monitor index status in Google Search Console and get an email alert if anything changes. )
Style Transfer for Time Lapse Photography

TensorFlow Hub has a great sample for transferring the style of one image to another. You might have seen Munch's The Scream applied to a turtle, or Hokusai's The Great Wave off Kanagawa to the Golden Gate Bridge. It's fun to play with and I wondered how it would work for a timelapse video. I just posted my first attempt, four different shots of San Francisco and I think it turned out pretty well.
The four sequences were all shot on an A7C, one second exposure, ND3 filter and aperture/ISO as needed to hit one thousandth of a second before fitting the filter. Here's an example shot:

I didn't want The Scream or The Wave, so I asked my kids to pick two random pieces of art each so I could have a different style for each sequence:

The style transfer network wants a 256x256 style image so I cropped and resized the art as needed.
The sample code pulls images from URLs. I modified it to connect to Google Drive, iterate through a source folder of images and write the transformed images to a different folder. I'm running this in Google Colab which has the advantage that you get to use Google's GPUs and the disadvantage that it will disconnect, timeout, run out of memory etc. To work around this the modified code can be run as many times as needed to get through all the files and will only process input images that don't already exist in the output folder. Here's a gist of my adapted colab notebook:
One final problem is that the style transfer example produces square output images. I just set the output to 1920x1920 and then cropped a HD frame out the middle of each image to get around this.
Here's a more detailed workflow for the project:
I usually shoot timelapse with a neutral density filter to get some nice motion blur. When I shot this sequence it was the first time I'd used my filter on a new camera/lens and screwing in the filter threw off the focus enough to ruin the shots. Lesson learned - on this camera I need to nail the focus after attaching the filter. As I've been meaning to try style transfer for timelapse I decided to use this slightly bad sequence as the input. Generally for timelapse I shoot manual / manual focus, fairly wide aperture and ISO 100 unless I need to bump this up a bit to get to a 1 second exposure with the filter.
After shooting I use LRTimelapse and Lightroom 6 to edit the RAW photos. LRTimelapse reduces flicker and works well for applying a pan and/or zoom during processing as well. For this project I edited before applying the style transfer. The style transfer network preserves detail very well and then goes crazy in areas like the sky. Rather than zooming into those artifacts I wanted to keep them constant which I think gives a greater sense of depth as you zoom in or out.
Once the sequence is exported from Lightroom I cancel out of the LRTimelapse render window and switch to Google Colab. Copy the rendered sequence to the input folder and the desired style image and then run the notebook to process. If it misbehaves then Runtime -> Restart and run all is your friend.
To get to video I use ffmpeg to render each sequence. For this project at 24 frames per second and cropping a 1920x1080 frame from each of the 1920x1920 style transfer images.
Then DaVinci Resolve to edit the sequences together. I added a 2 second cross dissolve between each sequence and a small fade at the very beginning and end.
Finally, music. I use Filmstro Pro and for this video I used the track Durian.
Here's the result:
Related Posts
- Coastal
- West Portal Timelapse of Timelapses
- World Webcams 2
- Slow Camera for Android
- West of West Portal
(Published to the Fediverse as: Style Transfer for Time Lapse Photography #code #ml #tensorflow #drive #python #video How to apply the TensorFlow Hub style transfer to every frame in a timelapse video using Python and Google Drive. )
How to backup Google Photos to Google Drive automatically after July 2019 with Apps Script
Warning - I no longer recommend using this script to backup Google Photos. The Google Photos API has too many bugs that Google doensn't seem interested in fixing. My personal approach at this point is to use Google Takeout to get a periodic archive of my most recent year of photos and videos. I have a tool that does some deduplication and puts everything in year/month folders. See Photo Sorter for more details.

Google has decided that backing up your photos via Google Drive is 'confusing' and so Drive based backup is going away this month. I love Google Photos but I don't trust it - I pull everything into Drive and then I stick a monthly backup from there onto an external drive in a fire safe. There is a way to get Drive backup working again using Google Apps Script and the Google Photos API. There are a few steps to follow but it's pretty straightforward - you should only need to change two lines in the script to get this working for your account.
First two four caveats to be aware of. Apps Script has a time limit and so it's possible that it could fail if moving a large number of photos. You should get an email if the script ever fails so watch out for that. Secondly and more seriously you could end up with two copies of your photos. If you use Backup and Sync to add photos from Google Drive then these photos will be downloaded from Google Photos by the script and added to Drive again. You need to either upload directly to Google Photos (i.e. from the mobile app or web site) or handle the duplicates in some way. If you run Windows then I have released a command line tool that sorts photos into year+month taken folders and handles de-duplication.
One more limitation. After a comment by 'Logan' below I realized that Apps Script has a 50MB limitation for adding files to Google Drive. The latest version of the script will detect this and send you an email listing any files that could not be copied automatically.
And a fourth limitation after investigating a comment by 'Tim' it turns out there is a bug in the Google Photos API that means it will not download original quality video files. You get some lower resolution version instead. Together with the file size limit this is a bit of a deal breaker for most videos. Photos will be fine, but videos will need a different fix.
On to the script. In Google Drive create a new spreadsheet. This is just a host for the script and makes it easy to authorize it to access Google Photos. Select 'Script editor' from the Tools menu to create a new Apps Script project.
In the script editor select 'Libraries...' from the Resources menu. Enter 1B7FSrk5Zi6L1rSxxTDgDEUsPzlukDsi4KGuTMorsTQHhGBzBkMun4iDF next to 'Add a library' and click add. This will find the Google OAuth2 library Pick the most recent version and click Save.
Select 'Project properties' from the File menu and copy the Script ID (a long sequence of letters and numbers). You'll need this when configuring the Google Photos API.
In a new window open the Google API Console, part of the Google Cloud Platform. Create a new project, click Enable APIs and Services and find and enable the Google Photos API. Then go to the Keys section and create an OAuth Client ID. You'll need to add a consent screen, the only field you need to fill out is the product name. Choose Web Application as the application type. When prompted for the authorized redirect URL enter https://script.google.com/macros/d/{SCRIPTID}/usercallback and replace {SCRIPTID} with the Script ID you copied above. Copy the Client ID and Client Secret which will be used in the next step.
Go back to the Apps Script project and paste the code below into the Code.gs window:
Enter the Client ID and Client Secret inside the empty quotes at the top of the file. You also need to add an email address to receive alerts for large files. There is a BackupFolder option at the top as well - the default is 'Google Photos' which will mimic the old behavior. You can change this if you like but make sure that the desired folder exists before running the script. Save the script.
Go back to the spreadsheet you created and reload. After a few seconds you will have a Google Photos Backup menu (to the right of the Help menu). Choose 'Authorize' from this menu. You will be prompted to give the script various permissions which you should grant. After this a sidebar should appear on the spreadsheet (if not choose 'Authorize' from the Google Photos Backup menu again). Click the authorize link from the sidebar to grant access to Google Photos. Once this is done you should be in business - choose Backup Now from the Google Photos Backup menu and any new items from yesterday should be copied to the Google Photos folder in Drive (or the folder you configured above if you changed this).
Finally you should set up a trigger to automate running the script every day. Choose 'Script editor' from the Tools menu to re-open the script, and then in the script window choose 'Current project's triggers' from the Edit menu. This will open yet another window. Click 'Add Trigger' which is cunningly hidden at the bottom right of the window. Under 'Choose which function to run' select 'runBackup'. Then under 'Select event source' select 'Time-driven'. Under 'Select type of time based trigger' select 'Day timer'. Under 'Select time of day' select the time window that works best for you. Click Save. The backup should now run every day.
The way the script is written you'll get a backup of anything added the previous day each time it runs. If there are any duplicate filenames in the backup folder the script will save a new copy of the file with (1) appended in front of the filename. Let me know in the comments if you use this script or have any suggestions to improve it.
More Google Apps Script Projects
- Get an email when your security camera sees something new (Apps Script + Cloud Vision)
- Get an email if your site stops being mobile friendly (no longer available)
- Export Google Fit Daily Steps, Weight and Distance to a Google Sheet
- Email Alerts for new Referers in Google Analytics using Apps Script
- Animation of a year of Global Cloud Cover
- Control LIFX WiFi light bulbs from Google Apps Script
- Using the Todoist API to set a due date on the Alexa integration to-do list (with Apps Script)
- Automate Google PageSpeed Insights and Core Web Vitals Logging with Apps Script
- Using the Azure Monitor REST API from Google Apps Script
- Monitor page index status with Google Sheets, Apps Script and the Google Search Console API
(Published to the Fediverse as: How to backup Google Photos to Google Drive automatically after July 2019 with Apps Script #code #software #photos #appsscript #google #sheets #drive #api Easy to configure apps script to continue backing up your Google Photos to Google Drive after the July 2019 change. You just need to change two lines of the script to get this running with your Google Photos account. )
Animation of a year of Global Cloud Cover
Update April 19, 2020: I made a longer, higher resolution version which you can find here.
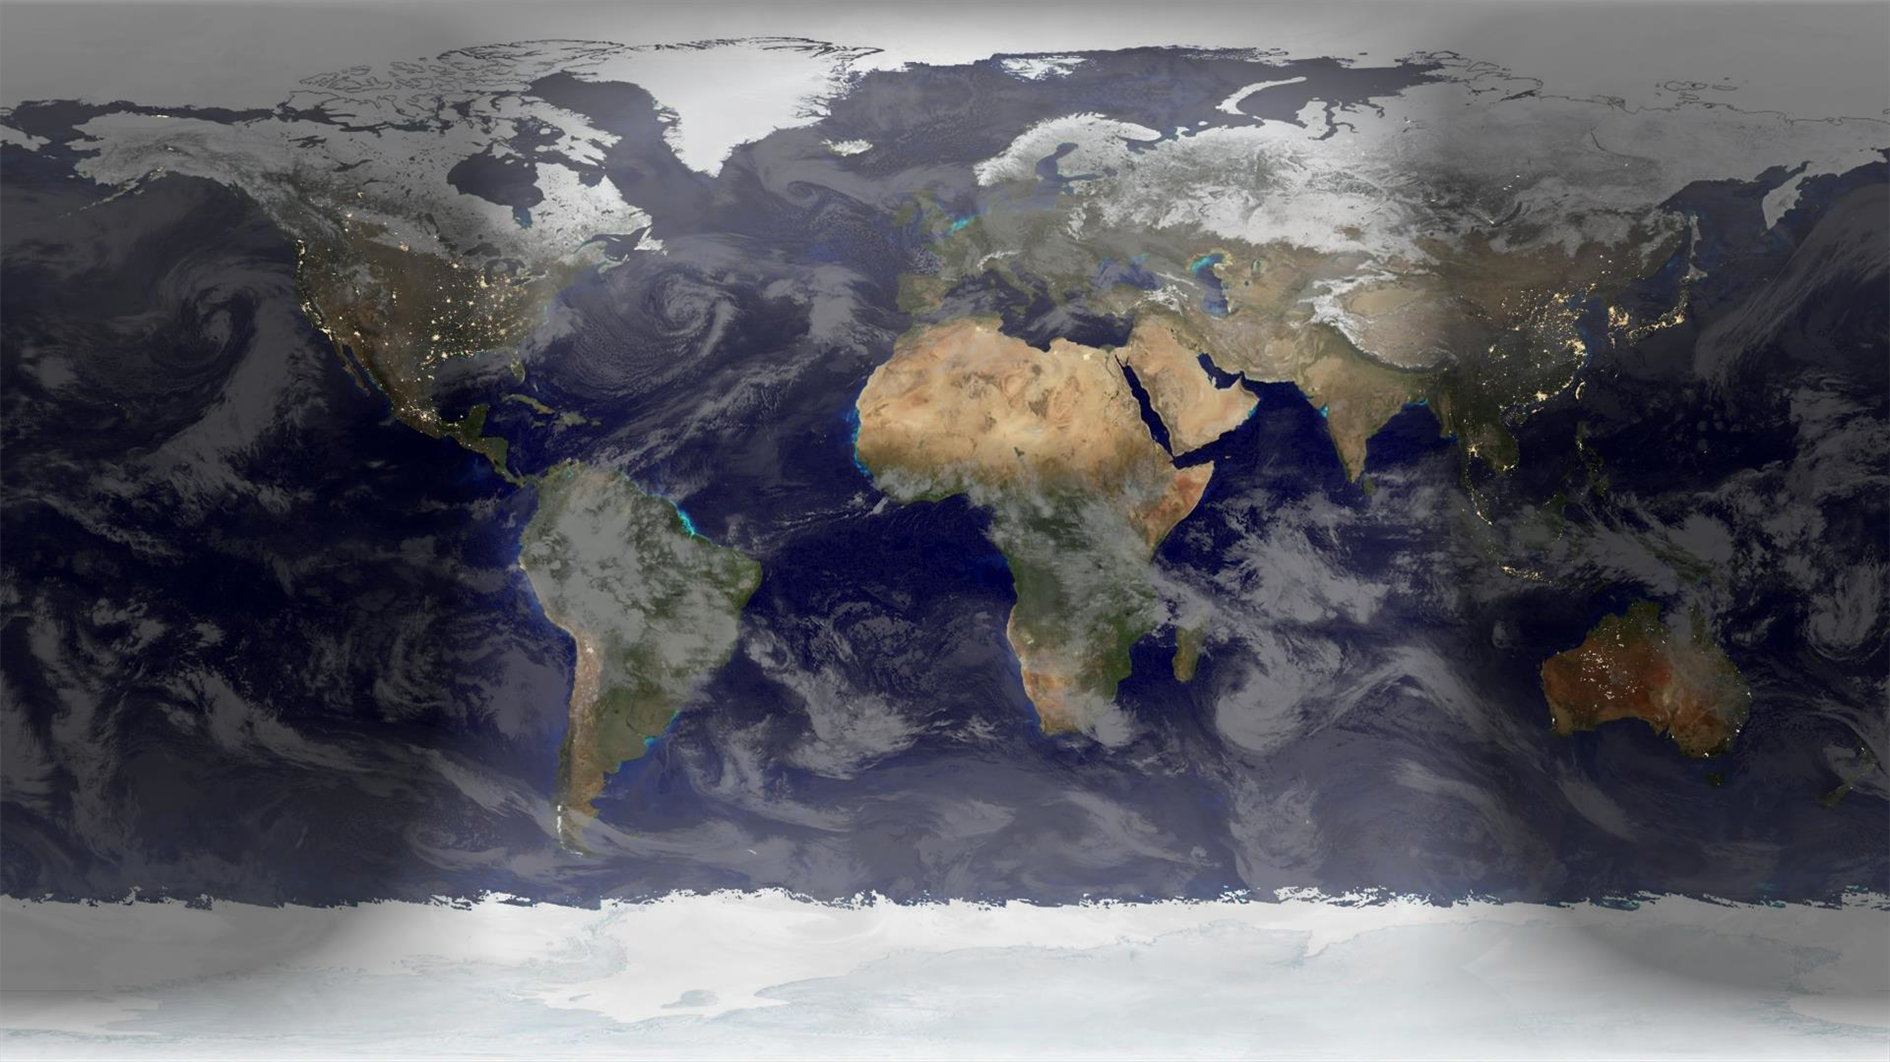
Here's an animation showing a year of global cloud cover (from July 2017 to July 2018) :
The clouds are sourced from the free daily download at xplanet. I run a Google apps script that saves a copy of the image to Google Drive every day (basically the same as this script to save Nest cam images). The hard part was waiting a year to get enough frames. Xplanet combines GEOS, METEOSAT and GMS satellite imagery with some reflection near the poles. Although I didn't need to for this project note that you can subscribe to higher quality / more frequent downloads.
As well as the clouds you can also see the terminator between day and night change shape over the course of the year. This video starts and ends with the Summer equinox when days are longest in the Northern hemisphere.
Where it's nighttime the image is based on NASA's Black Marble. The daytime is based on Blue Marble, but blended with a different older image which has better ocean colors and interpolated daily between twelve monthly Blue Marble satellite images. The result of this is that you can see snow and ice coverage changing over the course of the year. If you look closely you'll also notice vegetation growing and dying back with the seasons.
Rendered in a slightly modified build of Catfood Earth (the main release doesn't know how to access my private cache of xplanet cloud images). As well as combining day, night and cloud images Catfood Earth can also show you earthquakes, volcanoes, US weather radar, political borders, places and time zones. It has been enlivening Windows desktop wallpaper for fifteen years now (as shareware back when that was a thing, these days it's a free download for Windows and Android).
More Google Apps Script Projects
- Get an email when your security camera sees something new (Apps Script + Cloud Vision)
- Get an email if your site stops being mobile friendly (no longer available)
- Export Google Fit Daily Steps, Weight and Distance to a Google Sheet
- Email Alerts for new Referers in Google Analytics using Apps Script
- Control LIFX WiFi light bulbs from Google Apps Script
- How to backup Google Photos to Google Drive automatically after July 2019 with Apps Script
- Using the Todoist API to set a due date on the Alexa integration to-do list (with Apps Script)
- Automate Google PageSpeed Insights and Core Web Vitals Logging with Apps Script
- Using the Azure Monitor REST API from Google Apps Script
- Monitor page index status with Google Sheets, Apps Script and the Google Search Console API
(Published to the Fediverse as: Animation of a year of Global Cloud Cover #code #software #video #animation #appsscript #drive #earth #nasa #xplanet Timelapse video showing cloud cover, day and night and changing seasons. Rendered in Catfood Earth. )
Export Google Fit Daily Steps, Weight and Distance to a Google Sheet
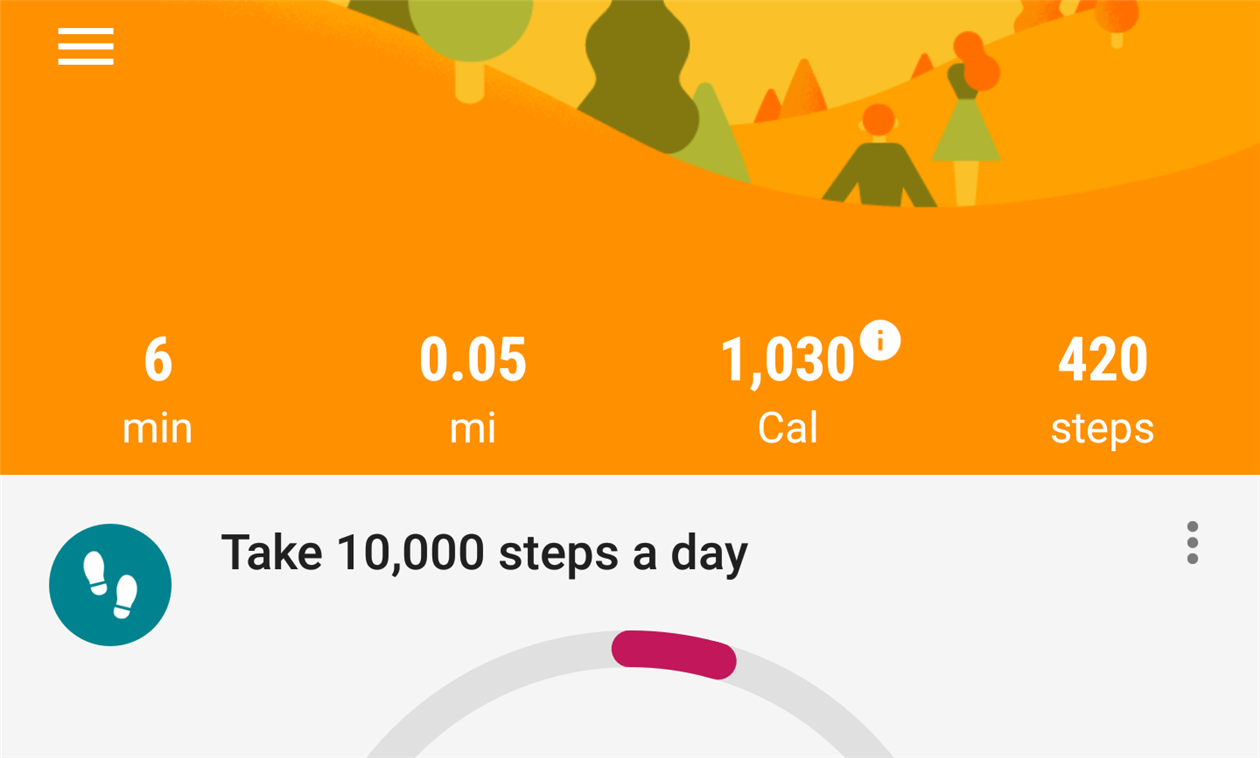
Google Fit is a great way to keep track of your daily step count without needing to carry a Fitbit or other dedicated tracker. It's not easy to get that data out though, as far as I can tell the only way is Google Takeout which is not made for automation. Luckily there is an API and you can do almost anything with Google Sheets.
If you're looking to export your step count, weight and distance this post has everything you need, just follow the instructions below to get your spreadsheet up and running. This is also a good primer on using OAuth2 with Google Apps Script and should be a decent starting point for a more complex Google Fit integration. If you have any questions or feedback please leave a comment below.
To get started you need a Google Sheet, an apps script project attached to the sheet and a Google API Project that will provide access to the Fitness API. That might sound intimidating but it should only take a few minutes to get everything up and running.
In Google Drive create a new spreadsheet and call it whatever you like. Rename the first tab to 'Metrics'. Enter 'Date' in cell A1, 'Steps' in B1, 'Weight' in C1 and 'Distance' in D1. To grab history as well create another tab called 'History' with the same headers. Next select 'Script editor...' from the Tools menu which will open a new apps script project.
Give the apps script project a name and then select 'Libraries...' from the Resources menu. Next to 'Add a library' enter 1B7FSrk5Zi6L1rSxxTDgDEUsPzlukDsi4KGuTMorsTQHhGBzBkMun4iDF and click Add. This will find the Google OAuth2 library. Choose the most recent version (24 at the time of writing) and click Save. Then select 'Project properties' from the File menu and make a note of the Script ID (a long series of letters and numbers).
Open the Google API Console. Create a new project and name it something like 'Google Fit Sheet'. From the Dashboard click Enabled APIs and services and find and select the Fitness API. Then go to Credentials and create an OAuth Client ID. You'll be asked to create a consent screen, the only field you need to enter is the product name (i.e. 'My Fit App'). Then choose Web Application as the application type. You need to set the name and the authorized redirect URL. The redirect URL is https://script.google.com/macros/d/{SCRIPTID}/usercallback replacing {SCRIPTID} with the actual Script ID you made a note of above. After adding this make a note of the Client ID and Client Secret.
Go back to the apps script project and paste the code below into the Code.gs window:
Right at the top of the code there are spaces to enter the Client ID and Client Secret from the API Console. Enter these and save the project.
Switch back to your Google Sheet and reload. After reloading there will be a Google Fit menu item. First select Authorize... You'll get a screen to authorize the script and then a sidebar with a link. Click the link to authorize the script to access your Google Fit data. You can then close the sidebar and select Get Metrics for Yesterday from the Google Fit menu. You should see a new row added to the spreadsheet with yesterday's date and fitness data.
The final step is to automate pulling in the data. Go back to the apps script project and select Current project's triggers from the Edit menu. Add a trigger to run getMetrics() as a time driven day timer - I recommend between 5 and 6am. You can also click notifications to add an email alert if anything goes wrong, like your Google Fit authorization expiring (in which case you just need to come back and authorize from the Google Fit menu again.
At this point you're all set. Every day the spreadsheet will automatically update with your step count from the day before. You can add charts, moving averages, export to other systems, pull in your weight or BMI, etc. I want to add a seven day moving average step count to this blog somewhere as a semi-public motivational tool... watch this space.
Note that weight will be blank in the spreadsheet for days with no weight data. Google Fit doesn't return the last known weight, only the known value for days where an update was recorded.
If you are looking to extend this sample to other data types then this API explorer page is very helpful for finding data types that the API documentation doesn't list.
A couple of times working on this script I got my authorization in a bad state and started getting a 400 error response from the API. If this happens run your Google Fit app, click the Profile icon at the bottom and then the Settings icon at the top right. Click Manage connected apps and then disconnect the script from Google Fit. Finally run the Reset Settings option from the menu in the sheet and then authorize again.
I updated this post on Jan 21, 2019 to extend the sample to handle weight and distance as well as steps. I also improved the history function to handle many days in one API call rather than a quick hack I added earlier that pulled a day at a time. I'd recommend using the code above rather than anything included in comments below (at least comments before this update).
More Google Apps Script Projects
- Get an email when your security camera sees something new (Apps Script + Cloud Vision)
- Get an email if your site stops being mobile friendly (no longer available)
- Email Alerts for new Referers in Google Analytics using Apps Script
- Animation of a year of Global Cloud Cover
- Control LIFX WiFi light bulbs from Google Apps Script
- How to backup Google Photos to Google Drive automatically after July 2019 with Apps Script
- Using the Todoist API to set a due date on the Alexa integration to-do list (with Apps Script)
- Automate Google PageSpeed Insights and Core Web Vitals Logging with Apps Script
- Using the Azure Monitor REST API from Google Apps Script
- Monitor page index status with Google Sheets, Apps Script and the Google Search Console API
(Published to the Fediverse as: Export Google Fit Daily Steps, Weight and Distance to a Google Sheet #code #software #fit #appsscript #google #sheets #drive Detailed instructions for setting up an automatic daily export of your step count from Google Fit to a Google Sheet. Uses Google Sheets, Apps Script and the Google Fitness API. )
Get an email when your security camera sees something new (Apps Script + Cloud Vision)
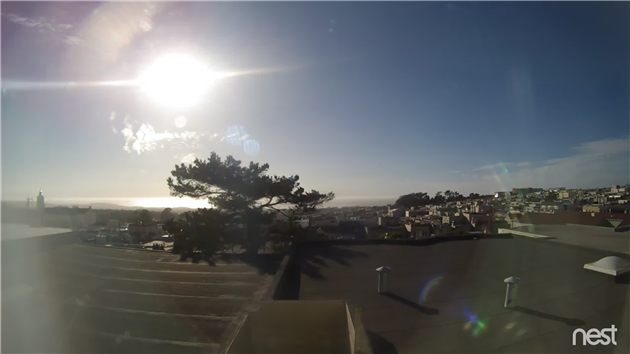
Nest (previously DropCam) can email you when it detects activity but that gets boring quickly. How about an email only when it sees something totally new?
The script below downloads a frame from a web cam and then calls the Google Cloud Vision API to label features. It keeps a record of everything that has previously been seen and only sends an email when a new feature is detected. You could easily tweak this to email on a specific feature (i.e. every time your dog is spotted), or to count the number of times a feature appears. I'm using a Nest cam but any security camera that has a publicly visible image download URL will work.
There is a bit of setup to get this working. Create a new Apps Script project in Google Drive and paste the code above in. You'll need to provide you own values for the three variables at the top.
OAuthCreds is the contents of the JSON format private key file for a Google Developer Console project. Go to the console, create a new project and enable the Cloud Vision API. You'll also need to enable billing (more on this below) - a trial account will work fine for this. Once the API is enabled create a service account under Credentials and download the JSON file. Just paste the contents of this into the script.
That's the hard part over. Now enter the URL of the image to monitor (see this post for instructions on finding this for a Nest / DropCam device) as MonitorImageUrl and your email address for SendEmailTo.
One last thing - follow the instructions here to reference the OAuth2 for Apps Script library.
Once this is all done run the script (the main() function) and authorize it. You should get an email with a picture attached and a list of the labels detected together with a confidence score from 0 to 1. If this doesn't happen check the logs (under the View menu).
You can now schedule the script to run repeatedly (Resources -> Current project's triggers). You get up to 1,000 units a month for free so once an hour should be safe. If you need more frequent updates check the Cloud Vision pricing guide for details.
After a few runs you should only get an email when something new is detected. If you're seeing too many wild guesses then add a filter on the score to exclude low confidence features.
Enjoy, and leave a comment if you have problems (or modify this in interesting ways).
More Google Apps Script Projects
- Get an email if your site stops being mobile friendly (no longer available)
- Export Google Fit Daily Steps, Weight and Distance to a Google Sheet
- Email Alerts for new Referers in Google Analytics using Apps Script
- Animation of a year of Global Cloud Cover
- Control LIFX WiFi light bulbs from Google Apps Script
- How to backup Google Photos to Google Drive automatically after July 2019 with Apps Script
- Using the Todoist API to set a due date on the Alexa integration to-do list (with Apps Script)
- Automate Google PageSpeed Insights and Core Web Vitals Logging with Apps Script
- Using the Azure Monitor REST API from Google Apps Script
- Monitor page index status with Google Sheets, Apps Script and the Google Search Console API
(Published to the Fediverse as: Get an email when your security camera sees something new (Apps Script + Cloud Vision) #code #drive #google #dropcam #nest #appsscript #vision How to use Apps Script and the Google Cloud Vision API to monitor a webcam and send email when it spots something new )
Capture DropCam (Nest Cam) frames to Google Drive
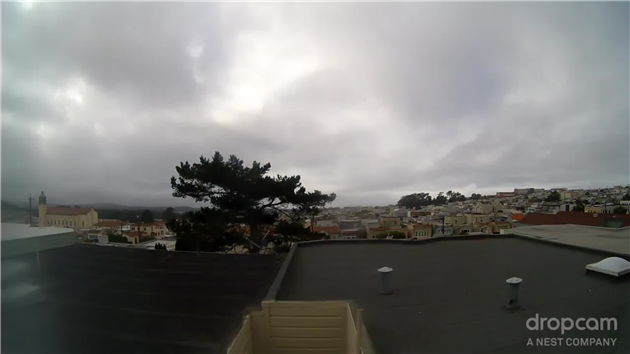
Updated June 17, 2019: This is now broken for Nest/DropCam devices. It will still work for anything that has a web accessible image URL. Clint points out in the comments below that you can fix up the URL for Nest cams but it looks like you need to be logged into nest.com so it doesn't work from Apps Script. Google is also retiring Works with Nest because they're "...reimagining how technology and services can deliver simple and helpful experiences in your home..." which apparently translates to only working with Google Assistant. I'll update this post if I figure out a work around.
Here's an easy way to capture frames from a DropCam to Google Drive. This only works if you have a public feed for your DropCam.
Go to the public page for your DropCam (Settings -> Public -> Short URL Link) and then view source for that page. Near the top you can find the still image URL for your DropCam:
<meta property="og:image" content="https://nexusapi.dropcam.com/get_image?uuid=12345&height=200" />
In Google Drive create a new Apps Script (If you don't already have Apps Script you can find it via Connect more apps...). Paste in the following code:
Replace the uuid parameter in the URL with the uuid from the still image URL for your DropCam. Note that the height parameter in the script has been changed to 1280 to get the largest possible image. A timestamp is being used to add a random cache busting parameter to the still image URL and is also used as the filename for the image.
The script will save the images to a folder called DCFrames - either create this folder in your drive or change this parameter to the desired folder.
Run the script and check that it's working. If everything looks good go to Resources -> Current project's triggers in the Apps Script editor. You can now set up a timer to save a frame as frequently as every minute (which I'm using to collect frames to make a daily time lapse movie). You can also ask Apps Script to send you an email when the script fails.
Updated 2015-07-01: DropCam is now Nest Cam - assuming that Nest keep the API going everything should keep working as above for both types of camera.
Related Posts
- Get an email when your security camera sees something new (Apps Script + Cloud Vision)
- How to backup Google Photos to Google Drive automatically after July 2019 with Apps Script
- West of West Portal
- World Webcams 2
- Export Google Fit Daily Steps, Weight and Distance to a Google Sheet
(Published to the Fediverse as: Capture DropCam (Nest Cam) frames to Google Drive #etc #drive #google #dropcam Use Google Apps Script to automatically save images from your Nest Cam / Drop Cam. Keep an archive or create a timelapse movie. )